Green Screen Lighting: Even Backdrop, Clean Key
Author: Fiat Lux Guides Editorial Team Reviewer: Fiat Lux Guides Editorial Team Most recently reviewed First published Filed under Video Lighting
Light a green screen by illuminating the backdrop separately from the subject so the fabric reads as one uniform shade of green. Keep the subject far enough forward to prevent body shadows and green bounce-light spill, use diffused lights on both sides of the screen, and lock manual camera exposure and white balance.
Belongs to the guide: Video Lighting Setup for Calls and YouTube
Checked by Fiat Lux Guides’ editorial desk against the cited sources.
A clean chroma key depends far more on physical lighting than on software sliders. In any video lighting setup, green screen problems—jagged hair edges, gray halos, or transparent patches—almost always trace back to uneven backdrop brightness, cast shadows, or green light bouncing onto the subject.
Why green screen lighting must be separate from subject lighting
Treating the green screen and the person in front of it as two independent lighting zones prevents shadows and lets you control contrast cleanly. When a single front light illuminates both you and the backdrop, your body blocks light from the fabric behind you, creating a dark shadow silhouette that is a completely different shade of green.
By lighting the screen with dedicated fixtures and lighting yourself separately, you can keep the backdrop uniform from corner to corner while shaping your face with a natural key-to-fill balance. For mains-powered studio fixtures, always follow the manufacturer’s manual and consult a licensed electrician for any building wiring.
How to light a green screen evenly
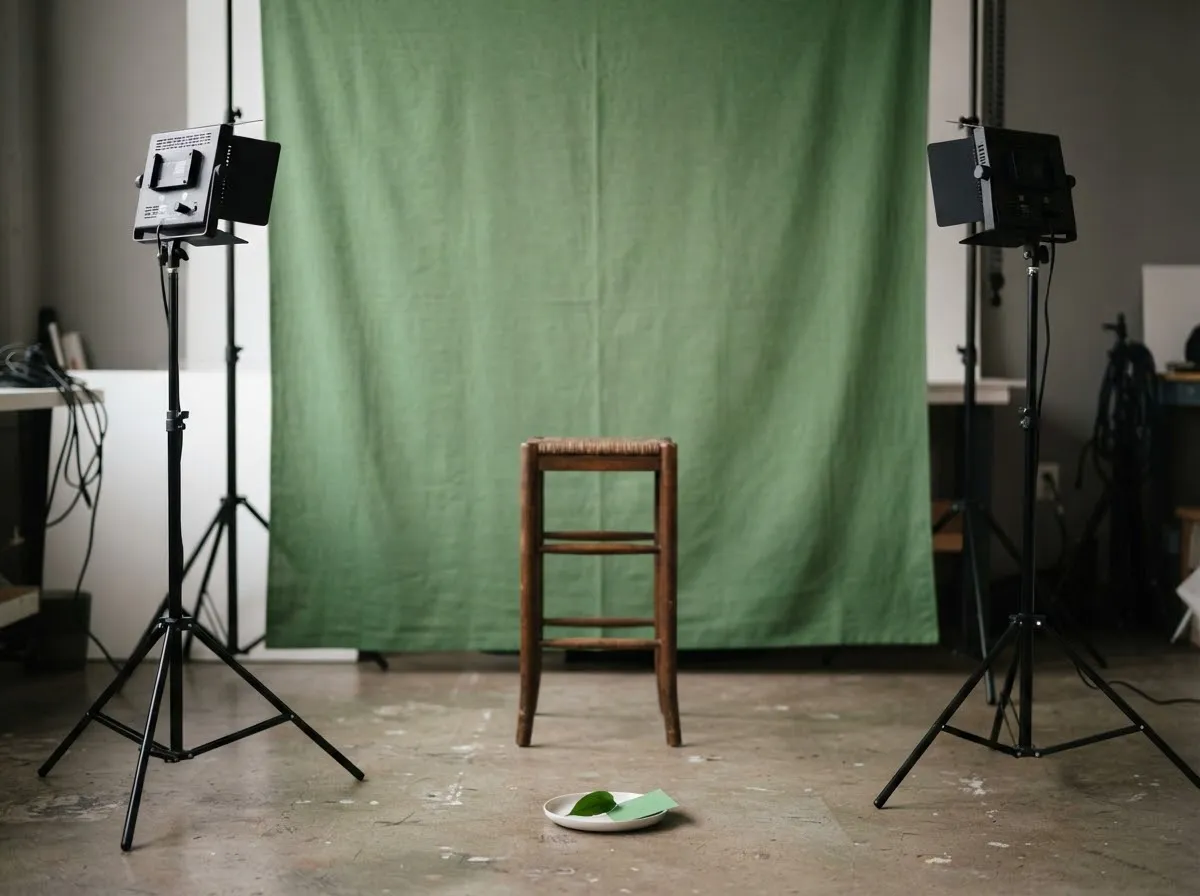
Use two diffused lights aimed across the backdrop from opposite sides so their beams overlap smoothly in the center without creating bright hotspots.
- Pull the fabric completely flat: Stretch collapsible or hanging screens taut so folds and creases do not cast miniature shadows across the green surface.
- Place two diffused lights at equal angles: Position one softbox or diffused LED panel on the left and one on the right, aimed across the screen toward the opposite edge. Aiming each light slightly across the center—rather than straight at the nearest corner—evens out brightness across the full width.
- Keep backdrop lights far enough back: Because light falls off rapidly near a fixture under the inverse square law, placing a light right against the fabric creates a bright hotspot near the edge and a dark falloff toward the middle. Pulling the lights back a few feet lets the beam spread evenly. You can test how distance changes falloff with our light distance exposure calculator.
- Match color temperatures: Use daylight-balanced lights (such as 5600 K) on both the backdrop and your face so the green fabric does not pick up warm orange or cool blue patches from stray room lamps.
Separating the subject to stop shadows and green spill
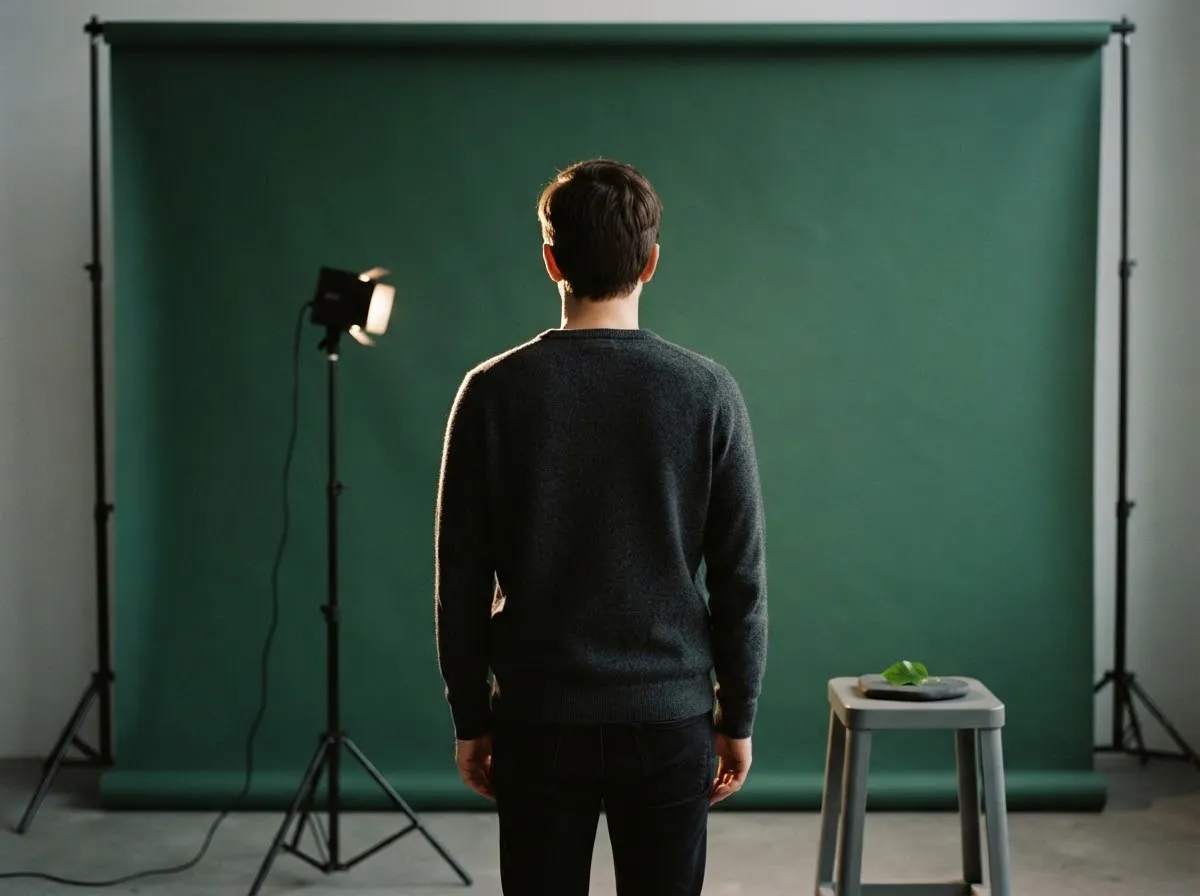
Increasing the distance between you and the green screen solves two common keying failures at once: cast shadows and green spill.
- Preventing shadows: When you sit too close, your subject key light hits the screen behind you and casts a sharp shadow. Moving forward lets the key light fall away before reaching the fabric, or lets the screen’s own lights wash out any faint shadow.
- Reducing green spill: A brightly lit green screen acts like a giant green reflector, bouncing green light onto the back of your neck, hair, glasses, and shoulders. Stepping forward cuts the amount of reflected green light reaching you, and keeping the backdrop slightly dimmer than a blinding neon green reduces bounce even further.
- Adding a subtle rim light: If you have a spare light, placing a small backlight or hair light above and behind you—angled away from the screen—creates a clean bright edge around your hair and shoulders that helps separate you from the background and counteracts faint green spill.
Camera settings that preserve clean edges
Once your physical lighting is even, locking camera settings prevents compression noise and color drift from ruining the key. Keying software removes pixels close to a chosen key color. Keying is done in your editing or streaming software (see the OBS Studio Chroma Key Filter guide for one example), so noisy or shifting green makes the software’s job harder and can erode edges.
- Keep ISO low: High ISO adds color noise that makes smooth green pixels speckle into different shades, which causes shimmering edges when keyed. Use Nikon’s ISO principle and add physical light rather than boosting gain.
- Lock manual exposure and white balance: Disable auto exposure and auto white balance in your camera or utility (such as Logi Tune) so the green shade stays constant throughout the recording. See webcam exposure and white balance settings for step-by-step setup.
- Fix it in the room first: Keying adjustments belong to your editing or streaming software, so follow that software’s own documentation and treat any software cleanup as a last, light touch after the lighting is even.
Quick green screen troubleshooting
If your key still shows artifacts, check the physical setup before pushing software sliders further, and review our YouTube lighting setup on a budget or three-point lighting guide for subject placement.
| Keying problem | Cause in the room | Physical fix |
|---|---|---|
| Dark blotches remain in background | Uneven backdrop lighting or wrinkles | Pull screen taut and balance left/right diffused lights |
| Green halo on hair and shoulders | Subject too close to bright screen | Move subject forward and dim backdrop slightly |
| Body or clothing turns transparent | Wearing green or a screen that is too dark in places | Change clothing and even out screen light |
| Shimmering, noisy edges | High camera ISO or shutter blur | Add light, lower ISO, lock shutter speed |
Read more about how we source and check technical guidance in our editorial policy.
Common questions
Why does my green screen have dark patches or a halo around my hair?
Dark patches happen when the backdrop is lit unevenly or your body casts a shadow onto the fabric. Trying to fix those darker greens afterward in your keying software tends to cut into hair edges and clothing. Lighting the backdrop evenly from both sides solves this at the source.
How far should I sit or stand from a green screen?
Sit or stand as far forward as your room allows—typically several feet in front of the backdrop. Extra distance stops your key light from casting shadows onto the green screen and dramatically reduces green bounce light (spill) reflecting off the fabric onto your shoulders and hair.
Should I light the green screen and myself with the same light?
No. Using one front light for both you and the green screen casts your shadow directly onto the backdrop and makes the screen darker than your face. Light the green screen with its own dedicated diffused lights, and light yourself separately from the front.
What color temperature lights should I use for a green screen?
Use lights with the same Kelvin color temperature for both your subject and the green screen—typically 5600 K daylight-balanced LEDs—and lock your camera's white balance manually. Mixing warm and cool lights creates uneven color shifts across the fabric that are harder to key cleanly.
Why does a wrinkled green screen fail to key cleanly?
Wrinkles and creases create tiny peaks and valleys that catch light at different angles, producing bright green ridges and dark green shadows right next to each other. Pulling the fabric taut or steaming out creases gives the camera a flat, uniform surface to sample.
What we checked
- OBS Studio Knowledge Base: Chroma Key Filter, checked 2026-11-14 (obsproject.com)
- Logitech Support: Logi Tune, checked 2026-11-14 (support.logi.com)
- HyperPhysics: Inverse Square Law, Light, checked 2026-11-14 (hyperphysics.gsu.edu)
- Nikon USA: ISO Control, checked 2026-11-14 (nikonusa.com)
You might also like
- Video Lighting Setup for Calls and YouTube
Build a clean video lighting setup for calls and YouTube using window light or continuous LEDs, simple angles, distance control, and color matching.
- LED Flicker on Camera: Shutter Speed and Banding
Stop LED flicker and rolling-shutter banding in video and stills by matching shutter speed to 50 Hz or 60 Hz mains and using anti-flicker tools.
- Lighting a Small Home Office for Video
How to light a cramped home office or bedroom desk for sharp, flattering video calls and recordings without bulky stands or wall glare.
- Lighting for Online Teaching and Webinars
Set up comfortable, flicker-free, low-glare lighting for multi-hour online teaching, webinars, and livestreams with steady color.
- Lighting for Talking-Head Videos
Light talking-head and interview videos cleanly with one, two, or three lights by controlling key angle, fill ratio, hair separation, and glare.
- Lighting for Glasses: Avoiding Glare on Camera
Stop glasses glare on camera using the law of reflection: raise and angle your lights, adjust screen brightness, and use anti-reflective lens coatings.