YouTube Lighting Setup on a Budget
Author: Fiat Lux Guides Editorial Team Reviewer: Fiat Lux Guides Editorial Team Most recently reviewed First published Filed under Video Lighting
A budget YouTube lighting setup starts with one soft key light placed slightly off-axis from the camera and above eye level, paired with a neutral background and matched color temperature. You do not need a three-light kit on day one; a single daylight window or one bi-color LED with diffusion produces clean skin tones when you control room ambient light.
Belongs to the guide: Video Lighting Setup for Calls and YouTube
A clean YouTube lighting setup does not require an expensive multi-light kit. As covered in our main video lighting setup guide, the fastest way to improve image quality on a tight budget is to control where your main light sits, how large it appears to your subject, and whether its color matches the rest of the room.
Most beginner video problems—grainy shadows, orange skin tones, and flat faces—come from relying on overhead room bulbs or auto camera settings rather than too little gear. By starting with one controllable light source and turning off competing fixtures, you can get consistent, camera-ready results in a bedroom or small office.
Start with one key light, not a full kit
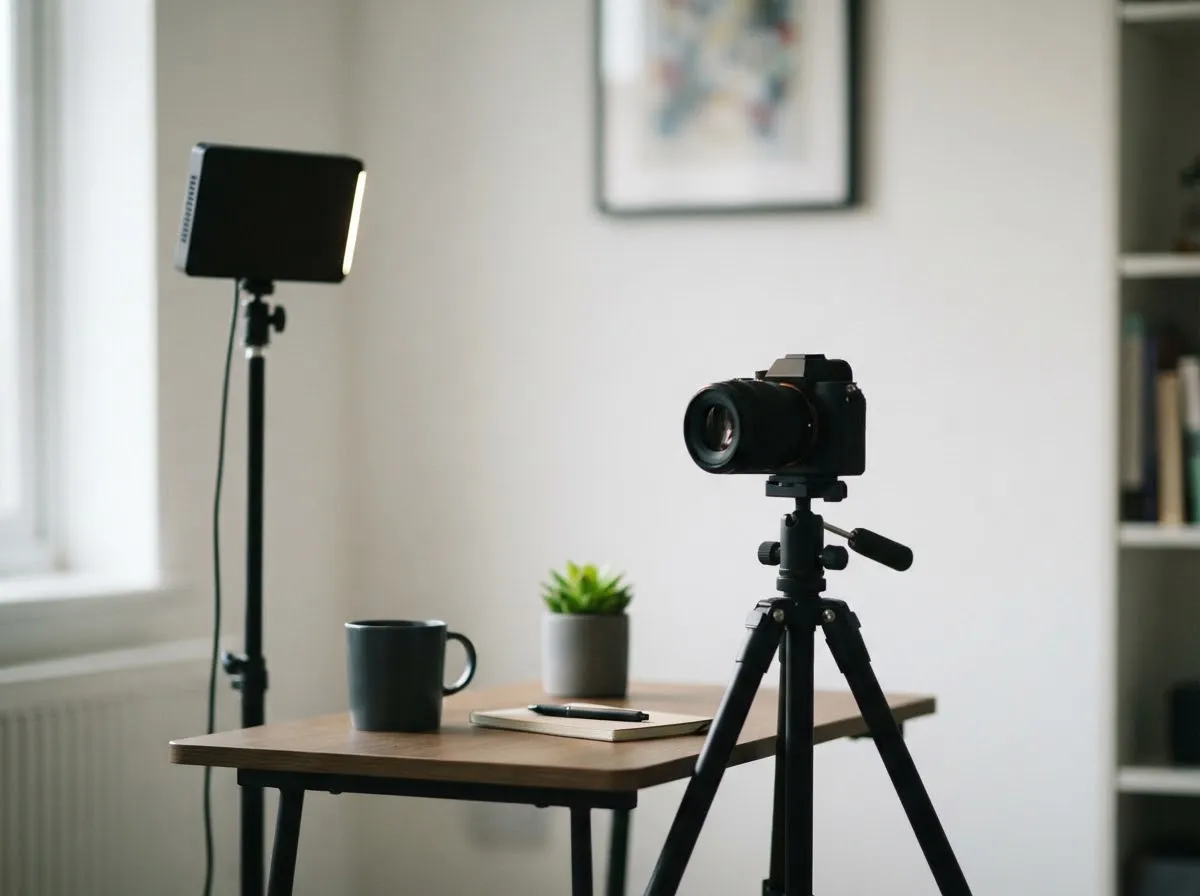
Begin with a single key light—either a daylight window or one diffused continuous LED light—before buying a three-light bundle. One well-placed source establishes clear highlight and shadow sides on your face, giving your frame depth that a flat, on-axis light removes.
If you already have a bright window, you can build a zero-cost setup around it using our window light for video and calls guide. When you film at night or in a windowless room, a single bi-color LED panel or compact COB fixture gives you repeatable output at any hour.
Follow the manufacturer’s manual for power and mounting, and consult a licensed electrician for any mains wiring.
Three budget YouTube lighting tiers compared
You can build a reliable setup at zero cost, with one fixture, or with a simple two-source arrangement as your channel grows.
| Setup tier | Light sources | Best use case | Main trade-off |
|---|---|---|---|
| Zero-cost natural | One window + white poster board bounce | Daytime talking-head videos | Output and color shift with clouds and time of day |
| Single LED key | One diffused LED panel or compact COB + softbox | Consistent evening or indoor filming | Shadows on the far side of the face stay darker |
| Key + background separation | One diffused key light + small accent or practical lamp | Small rooms where you sit close to a wall | Requires matching or intentionally contrasting Kelvin |
If you are still deciding between continuous panels, speedlights, or studio strobes for hybrid photo and video work, compare categories in our LED vs strobe vs speedlight guide.
Where to place your key light and camera
Place your key light to one side of the camera lens and slightly higher than your eye line, angled downward toward your face. Raising the light above eye level creates natural modeling under your cheekbones and chin without casting harsh eye-socket shadows, while offsetting it to the side prevents flat, passport-photo lighting.
Distance also changes how quickly light falls off behind you. Under the inverse square law (an idealized point-source model), illuminance drops in proportion to the square of the distance from a point source—moving a light from 1 meter to 2 meters cuts its intensity to one-fourth. Placing your key light closer to you lets you run the fixture at lower brightness (and lower camera ISO) while making the background behind you fall naturally darker. You can test exact distance-to-exposure trade-offs with our light distance exposure calculator.
How to soften a budget LED without buying a huge softbox
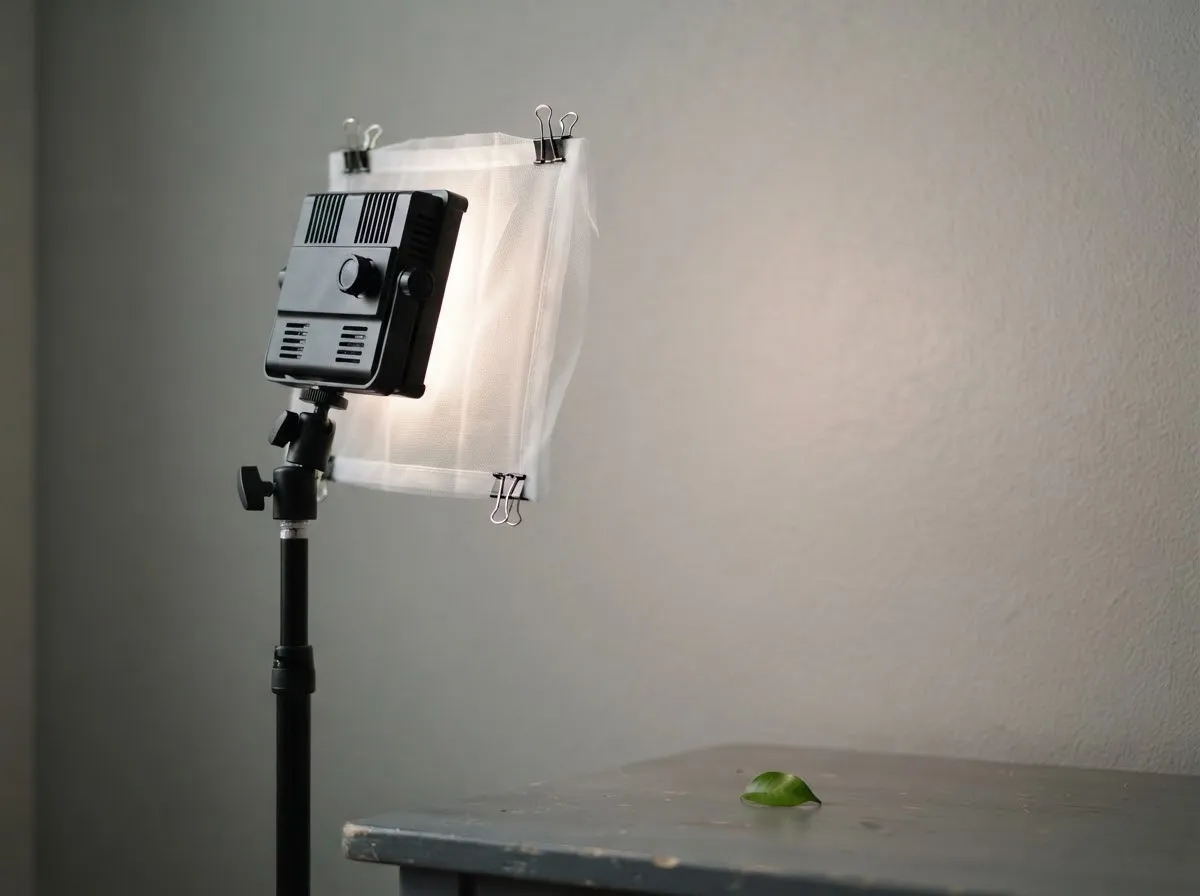
Light softness depends on the apparent size of the light source relative to your subject, not on the price of the fixture. A small, bare LED panel placed far away casts sharp, distracting shadows on the wall behind you; moving that same panel closer or diffusing it widens the transition zone between light and shadow.
- Use diffusion fabric or a compact softbox: Spreading the beam across a larger front surface softens shadow edges.
- Bounce off a white wall or foam board: Pointing a bare LED at a matte white surface turns that large surface into your effective light source, though you lose some output.
- Keep your background separated: Stepping a meter or two away from the wall behind you prevents your key light from throwing a sharp shadow directly beside your head.
Read more about how source size controls shadow edges in hard and soft light differences.
What specs actually matter on a budget video light
When comparing entry-level LED panels and COB lights, focus on color accuracy, color-temperature range, and dimming control rather than peak wattage alone.
- Color accuracy (CRI and TLCI): Look for lights that publish both CRI and TLCI ratings. As defined by the European Broadcasting Union in EBU Tech 3355, TLCI evaluates how accurately a luminaire renders colors for television and video camera sensors, where poor spectra can introduce green or magenta casts that are hard to fix in editing. For example, Aputure’s amaran COB 60x S lists CRI 96+ and TLCI 97+ on its product page.
- Bi-color CCT range: A bi-color fixture (many span roughly 2700K–6500K) lets you match warm indoor lamps or cool window daylight without buying separate gels.
- Stepless dimming and power options: Smooth dimming lets you fine-tune exposure without moving your stand, and AC plus battery power options help if you film away from a wall outlet.
Lock your camera exposure and white balance
Even a well-placed light will look inconsistent if your camera shifts brightness or color mid-sentence. Switch out of full auto exposure and auto white balance before hitting record.
In manual exposure mode, as described in Canon’s EOS R8 manual exposure guide, you set shutter speed and aperture directly while keeping ISO as low as your light allows to limit digital noise. For color, Canon’s EOS R6 white balance documentation notes that you can dial a fixed Kelvin value (2500K to 10000K) or shoot a neutral white target for Custom White Balance so skin tones stay identical across takes.
Check how your fixture’s Kelvin setting maps to camera presets using our Kelvin reference chart, and review our exposure basics for lighting guide if you need a refresher on stops, ISO, and aperture. Our fact-checking process explains how we verify manufacturer specs and standards documents for every guide.
Common questions
How many lights do you actually need for a beginner YouTube setup?
You only need one primary key light to start filming clean YouTube videos. A single diffused LED panel, a COB light with a softbox, or a shaded window placed off to one side of the camera gives your face shape and separates you from the background. You can add a reflector or a second fill or hair light later once your framing and exposure are consistent.
Should you buy a ring light or an LED panel for YouTube?
Choose an LED panel or a small COB light with a softbox if you want natural shadow depth or wear glasses. Ring lights mount around the lens and flatten facial shadows, which can also create bright circular reflections in eyeglasses. An off-axis panel or softbox produces softer modeling and keeps reflections out of your lenses.
What color temperature is best for YouTube lighting?
Set your key light to match the dominant light in your room—around 5200K to 5600K if you film near daylight windows, or around 3200K if you film at night under warm household lamps. Matching your camera white balance to the key light keeps skin tones neutral and prevents mixed orange-and-blue color casts across your frame.
Why does TLCI matter more than wattage when choosing a budget video light?
TLCI (Television Lighting Consistency Index) measures how accurately a light's spectrum renders colors on a camera sensor, whereas wattage only tells you how much electrical power the fixture draws. A lower-wattage LED with high CRI and TLCI ratings (95 or above) produces cleaner skin tones than a brighter, low-CRI bulb with green or magenta spikes.
How do you stop a budget LED light from looking harsh on camera?
Make the light source larger relative to your face and move it closer within your framing limits. Passing an LED panel through a diffusion sheet, bouncing it off a white foam board, or mounting a softbox increases the emitting surface area, which widens the shadow penumbra and softens transitions across your face.
Do you need to turn off ceiling lights when filming YouTube videos?
Yes, turning off overhead room lights usually improves video quality immediately. Overhead fixtures cast unflattering shadows under your eyes and nose and often run at a different color temperature than your key light. Controlling all visible light in the room lets your single key light define exposure and color.
What we checked
- amaran COB 60x S Product Specifications, checked 2026-11-14 (amarancreators.com)
- EBU Tech 3355: Television Lighting Consistency Index (TLCI-2012), checked 2026-11-14 (tech.ebu.ch)
- HyperPhysics: Inverse Square Law for Light, checked 2026-11-14 (hyperphysics.gsu.edu)
- Canon EOS R6 Manual: White Balance, checked 2026-11-14 (cam.start.canon)
- Canon EOS R8 Manual: ISO Speed and Manual Exposure, checked 2026-11-14 (cam.start.canon)
You might also like
- Video Lighting Setup for Calls and YouTube
Build a clean video lighting setup for calls and YouTube using window light or continuous LEDs, simple angles, distance control, and color matching.
- Green Screen Lighting: Even Backdrop, Clean Key
Light a green screen evenly and separate your subject from the backdrop to eliminate shadows, hotspots, and green spill for clean chroma keying.
- LED Flicker on Camera: Shutter Speed and Banding
Stop LED flicker and rolling-shutter banding in video and stills by matching shutter speed to 50 Hz or 60 Hz mains and using anti-flicker tools.
- Lighting a Small Home Office for Video
How to light a cramped home office or bedroom desk for sharp, flattering video calls and recordings without bulky stands or wall glare.
- Lighting for Online Teaching and Webinars
Set up comfortable, flicker-free, low-glare lighting for multi-hour online teaching, webinars, and livestreams with steady color.
- Lighting for Talking-Head Videos
Light talking-head and interview videos cleanly with one, two, or three lights by controlling key angle, fill ratio, hair separation, and glare.